
 SkillClick
How to turn a photo into a cartoon: 4 methods that work
Quick answer
To turn a image into a cartoon, upload a sharp, well-lit picture to an online cartoonizer, pick a style such as comic, anime, or flat illustration, adjust the intensity, and download the result as a PNG. You don't need drawing skills. Desktop software like GIMP gives you more control, and phone apps are faster for casual edits.
Introduction
A few months ago a friend sent me a photo of her dog and asked if I could make it look like a cartoon for a birthday card. I figured it would take five minutes. It took closer to an hour, because my first three attempts looked like a smudged oil painting.
That hour taught me most of what I know about how to turn a photo into a cartoon. The photo you start with, the style you pick, and a handful of settings decide whether the result looks clean or muddy. Before I run anything now, I check the file with an image size converter so the tool gets enough pixels to work with without choking on a 20 MB original.
In this guide I'll walk through four methods, from a one-click online option to a manual desktop workflow. I'll also cover photo preparation, which style fits which subject, how to find a cartoon image download free of watermarks, what to look for in a cartoon profile picture maker, and the mistakes I see most often.
What happens when you cartoonize an image?
When you cartoonize image files, software does three things in some order: it simplifies colors, strengthens edges, and smooths textures. A real face has thousands of tiny tonal shifts. A cartoon has maybe five or six flat color zones separated by bold outlines. A pencil-style photo to sketch effect keeps far more tonal detail, and that's the main difference between the two looks.
Older filters do this with math. They detect edges, blur the interior areas, and reduce the number of colors (a step called posterization). The result is predictable and fast, but it can look like a photo with a sticker effect on top.
Newer AI tools work differently. Many rely on a technique called neural style transfer, where a neural network separates the content of your photo from the look of a reference style and recombines them. That's why AI results often look hand-drawn. The face keeps its structure, but the shading and line work follow the style you chose.
Knowing this changes how you pick a tool. If you want a quick photo cartoon effect for a social post, a basic cartoon filter for photos is enough. If you want a portrait that looks like a character illustration, an AI-based converter usually gives better shapes around the eyes, hair, and mouth.
Which method should you use?
Here's how the four main approaches compare.
| Method | Best for | Skill needed | Control | Speed |
|---|---|---|---|---|
| Online AI converter | Portraits, pets, quick results | None | Medium | Under a minute |
| Phone app filter | Casual social posts | None | Low | Seconds |
| Desktop software (GIMP, Photoshop) | Custom looks, print work | Moderate | High | 10 to 30 minutes |
| Manual tracing | Logos, illustrations, mascots | High | Total | Hours |
For most people, the online converter is the right starting point, especially if you want to cartoonize image files in bulk or build a cartoon profile picture. You can always move to desktop software later if you want to fine tune line thickness or color palettes by hand.
How should you prepare a photo before cartoonizing it?
Photo preparation changes the result more than any setting inside the tool. I spend about two minutes on it, and it saves me from re-running the conversion five times.
Pick a photo with one clear subject. Busy backgrounds confuse edge detection. A portrait against a plain wall will produce cleaner lines than a crowded street scene.
Use even lighting. Harsh shadows across a face get turned into black blobs. Soft daylight from a window works better than a flash or overhead lamp.
Face the camera, roughly. Front-facing and three-quarter angles give the best results. Extreme side profiles and tilted heads often lose an eye or distort the jawline.
Check the resolution. A photo of at least 1000 pixels on the short side gives most converters enough detail. Huge originals slow uploads and sometimes get rejected. If yours is oversized, shrink it first.
Crop before you convert. Cropping afterward cuts into the outlines the tool just drew. Crop tight around the subject first, leaving a little breathing room around the head.
If your photo has a muddy or dull palette, pull out its main colors with an image color extractor before you start. Knowing the dominant tones helps you choose a style that won't clash with them. A warm-toned portrait pairs well with soft, painterly cartoon styles, while cool, high-contrast photos suit bold comic looks.
Method 1: how to turn a photo into a cartoon online
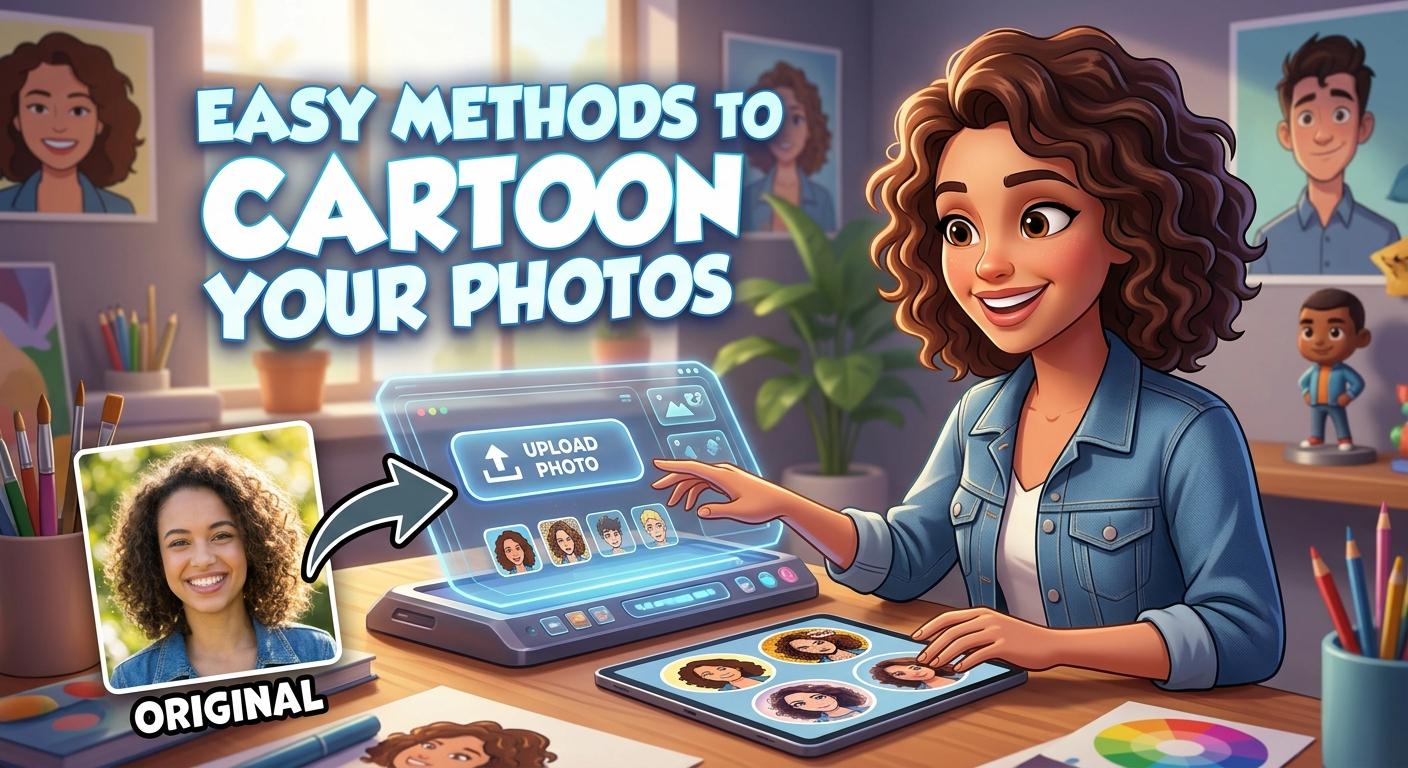
This is the fastest route, and it's the one I recommend first. Any tool that lets you cartoonize image uploads follows nearly the same steps, so you can apply these anywhere.
Step 1: Upload your photo
Open the converter and upload a JPG, PNG, or WebP file. Most tools accept those three formats. Drag and drop usually works on desktop, and on a phone you'll pick from your gallery.
Step 2: Choose a cartoon style
Styles vary, but you'll typically see options like classic cartoon, comic book, anime, 3D animation, and sketch. If you're unsure, start with classic cartoon. It keeps the most likeness and works on almost any subject.
Step 3: Adjust the intensity
Some tools give you a slider for how strongly the effect applies. I usually start around the middle. Pushing it to maximum tends to erase freckles, wrinkles, and small details that make a face recognizable.
Step 4: Preview and compare
Look at the result at 100 percent zoom, not as a thumbnail. Check the eyes first. If they're misaligned or one is missing, the rest of the image won't save it. Re-run with a different style or a cleaner source photo.
Step 5: Download the file
Save as PNG if you plan to edit the image or place it on a colored background. Save as JPG if you only need a small file for sharing. Check the output for a watermark before you close the tab.
That's the whole process for most people who want to know how to turn a photo into a cartoon without installing anything.
Method 2: using a cartoon filter for photos on your phone
Phone apps are the easiest option when you're away from a computer, and plenty of people first learn how to turn a photo into a cartoon this way. Many camera and photo editing apps include a cartoon filter for photos, and some social platforms add one as a camera effect.
A good cartoon filter for photos lets you set the strength. If the app applies one fixed look, treat it as a toy and use something else for serious work.
The upside is speed. You can apply the filter and post within seconds. The downside is control, and that's where an online converter pulls ahead. Most filters offer one or two looks, the output resolution is often low, and some apps compress the file heavily when you export.
Here's how I get the best out of phone filters:
- Take the original shot in good light instead of relying on the filter to fix a dark image.
- Hold the phone steady and focus on the face before you apply any effect.
- Save the unfiltered original separately so you can redo the edit later.
- Export at the highest quality setting the app offers.
If you plan to print the image or use it as a banner, skip the phone filter and use an online converter or desktop software. A small export will look soft and pixelated at larger sizes.
Method 3: cartoonizing a photo in GIMP or Photoshop
Desktop software is slower, but you control every step of the photo cartoon effect. I use this method when a client wants a specific line weight or a limited color palette.
In GIMP (free)
GIMP includes a built-in cartoon effect. Open your photo, then go to Filters, Artistic, and choose Cartoon. Two settings matter most:
- Mask radius controls how large the outlined areas are. A smaller value gives finer lines and more detail. A larger value gives chunkier shapes.
- Percent black controls how much of the outline gets filled in with black. Low values give a light, sketchy edge. High values give a heavy, comic-book edge.
Start with a mask radius around 7 and percent black around 0.2, then adjust in small steps. Every photo behaves a little differently, so expect to try several combinations.
In Photoshop
Photoshop doesn't have a one-click cartoon button, but the Filter Gallery gets close. Duplicate your layer, open the Filter Gallery, and combine Poster Edges with Cutout or Smart Blur. Poster Edges draws the outlines and flattens color, and Cutout simplifies shapes further. Adjust each slider while watching the face, and stop when the eyes still look like eyes.
A quick cleanup pass
After any desktop filter, I do three small fixes:
- Raise contrast slightly so the flat color zones separate.
- Boost saturation by a small amount, since filters often wash color out.
- Sharpen the outlines lightly, only at the end.
This extra step takes about two minutes and makes the photo cartoon effect look finished. Try the same photo cartoon effect before and after the contrast tweak and you'll see the difference.
Method 4: tracing the photo by hand
Manual tracing means placing the photo on a layer and drawing over it with a tablet or mouse in an app like Procreate, Krita, or Illustrator. You build outlines, fill color zones, and add shading yourself.
It takes the longest, but the result is a true illustration with clean vector or raster shapes. It's the right choice for mascots, logos, and any artwork you'll reuse at many sizes. For a quick avatar or a birthday card, it's overkill.
A middle path is to cartoonize image files automatically first, then trace over the best parts to fix eyes, hairlines, or hands that the software got wrong. I do this often. It cuts the manual time by more than half.
Which cartoon style fits which photo?
Style choice is where most beginners go wrong when they cartoonize image files for the first time. A style that suits a landscape can ruin a portrait.
| Photo type | Style that usually works | What to avoid |
|---|---|---|
| Solo portrait | Classic cartoon, soft comic, 3D animation | Heavy sketch styles that erase facial detail |
| Pet photo | Flat illustration, storybook, comic | Very dark outlines on dark fur |
| Couple or family | Classic cartoon with moderate intensity | Maximum intensity (faces blur together) |
| Landscape | Painterly, watercolor, anime backgrounds | Thick outlines, which clutter wide scenes |
| Product or object | Clean line art, flat color | Textured painterly styles |
If you like the soft, hand-painted look of animated films, try a Ghibli style conversion on landscapes and pets. It handles skies, grass, and fur better than a hard comic outline does.
A real walkthrough: turning a dog photo into a cartoon
Here's what I did with my friend's dog. The original was a 4000 by 3000 pixel phone shot taken indoors, with a yellow lamp on one side.
First, I cropped tightly around the head and shoulders, then shrank the file to about 1600 pixels wide. Next I tried a classic cartoon style at full strength. The fur became one flat brown shape and the eyes disappeared, which is the most common failure when you cartoonize image files with dark subjects.
On the second try I dropped the strength to about 70 percent and switched to a flat illustration style. The eyes survived, but the lamp made the white chest fur look orange. I fixed the white balance in my phone's editor, converted again, and the fur finally looked right.
The third attempt was good enough to print. Total time was around 20 minutes, including the two failed tries. A good photo cartoon effect depends on fixing light and crop first, and only then on picking a style.
If I had used a basic cartoon filter for photos from a camera app, I'd have gotten a similar flat look in seconds, but at a lower resolution. That trade-off is worth knowing before you decide how to turn a photo into a cartoon for a print project.
How do you get a cartoon image download free without a watermark?
Searching for a cartoon image download free of charge returns a mix of genuinely free tools and pages that give you a result covered in a watermark or locked behind a signup. Here's what I check before I trust a tool.
Look at the download button before uploading. Some tools show you the result and then ask for payment. If a page says "no watermark" in the main description, that's a better sign than a vague "free trial" label.
A true cartoon image download free of watermarks is rarer than the ads suggest, so test before you commit.
Check the output resolution. A free result that's 400 pixels wide is fine for a thumbnail and useless for anything else. Test with one photo first.
Read how uploads are handled. If you're converting a personal photo, find out whether the tool stores uploads, and for how long. Browser-based tools that process locally are the most private, but many online converters upload to a server, which is fine for ordinary pictures but not for sensitive ones.
Confirm the usage rights. Personal use is nearly always allowed. Commercial use, such as selling prints or using the image in an ad, depends on the tool's terms. Read the terms page for a minute. It's boring and it prevents problems.
Also remember the difference between downloading a cartoon of your own photo and downloading a stock cartoon. A cartoon made from your photo is based on your picture. A stock cartoon image from a gallery has its own license, and you should follow it.
How do you make a cartoon profile picture?
A cartoon profile picture needs a slightly different workflow because platforms crop it into a circle or a small square. A good cartoon profile picture maker should handle these details, but you can prepare for them yourself. When I test any cartoon profile picture maker, I check three things: a crop preview, a square export, and enough style choices to find one that looks like me.
- Start with a tight headshot. Shoulders up, face filling about 60 percent of the frame.
- Convert it using a classic or soft comic style. Heavy styles look noisy at 150 pixels.
- Center the face. Circular crops cut corners off, so keep key features near the middle.
- Export a square image of at least 1000 by 1000 pixels. Platforms shrink it, but starting large keeps edges sharp.
- Test the crop. Upload it and look at it on your phone, because that's where most people will see it.
A cartoon avatar from any decent cartoon profile picture maker works well for gaming accounts, creator channels, forums, and anywhere you'd rather not show your actual face. For a professional network, a cartoon avatar can feel casual, so consider how your audience will read it.
Common mistakes when you turn a photo into a cartoon
I've made all of these, some more than once.
- Using a low-resolution source. Small photos produce jagged outlines. Start with a clean, sharp file.
- Picking a style before looking at the subject. Test two or three styles on the same photo and compare.
- Setting the effect to maximum. Most of the time, 60 to 80 percent looks better and keeps the person recognizable.
- Ignoring the background. A cluttered background becomes cluttered cartoon shapes. Blur or crop it first.
- Converting a heavily filtered photo. Beauty filters and strong Instagram presets already change skin and edges, and the cartoon tool then stacks its own changes on top.
- Skipping the eyes check. Eyes carry the whole likeness. If they look wrong, redo it.
- Forgetting the original. Always keep the untouched photo. You'll want it when a better tool comes along.
What about privacy and copyright?
Two points deserve a short note before you share any cartoon image download free of charge or post your own.
First, photos of other people. If you're cartooning a photo of a friend, a child, or a coworker, get their okay before posting it. A cartoon version is still identifiable, especially for close contacts.
Second, copyrighted source photos. If you didn't take the photo, the cartoon version is still a derivative of someone else's work. Using a stock image, a celebrity photo, or a photographer's portrait can create licensing problems even after the cartoon effect is applied.
For anything commercial, keep a record of where the source photo came from and which tool you used.
Key takeaways
- Start with a sharp, well-lit photo that has a single clear subject.
- An online converter is the fastest way to turn a photo into a cartoon, and desktop software gives more control.
- A basic cartoon filter for photos is fine for casual posts, while a full photo cartoon effect from an AI tool suits portraits.
- Match the style to the photo type: portraits suit classic or soft comic looks, landscapes suit painterly styles.
- Keep the effect strength moderate so faces stay recognizable.
- Check for watermarks, resolution, and usage rights before you rely on any cartoon image download free of charge.
- Prepare profile pictures as tight, centered, square crops of at least 1000 pixels, whichever cartoon profile picture maker you use.
- Save your original photo so you can redo the conversion later with a different cartoon filter for photos or style.
Frequently asked questions
1. How do I turn a photo into a cartoon for free?
Upload your photo to a free online tool that lets you cartoonize image files, choose a style, adjust the intensity, and download the result. Most tools take under a minute. Check for watermarks and output size before you save. If you want more control, GIMP is a free desktop program with a built-in cartoon filter.
2. What is the best photo for cartoonizing?
A sharp, front-facing photo with soft, even lighting and a plain background works best. Aim for at least 1000 pixels on the short side. Avoid heavy shadows, strong beauty filters, and busy backgrounds, since these create messy outlines and lost details.
3. Does a photo cartoon effect lower image quality?
A photo cartoon effect changes the look of the image, but it doesn't have to reduce resolution. Quality drops when the source is small, the export is compressed, or the app saves at a low setting. Export as PNG at the largest size available to keep edges clean.
4. Can I use a cartoonized photo commercially?
It depends on the tool's terms and on who owns the original photo. If you took the photo yourself and the tool allows commercial use, you're usually fine. For ads, products, or resale, read the license carefully and consider asking a legal professional.
5. Is it safe to upload personal photos to online cartoon tools?
Most reputable tools handle uploads responsibly, but policies vary. Check whether the site stores your images and for how long. Avoid uploading sensitive photos, such as identity documents or images of children, to services whose privacy terms you haven't read.
6. What is the difference between a cartoon filter and AI cartoonizing?
A traditional cartoon filter for photos applies fixed math: edge detection, smoothing, and color reduction. AI cartoonizing uses a trained neural network that redraws the image in a learned style. Filters are faster and more predictable, while AI usually produces more natural, illustration-like faces.
7. Which format should I download my cartoon image in?
For any cartoon image download free of watermarks, choose PNG when you want the sharpest edges, plan to edit the image, or need a transparent background. Choose JPG when file size matters more than perfect edges, such as for email or quick social posts.
8. How do I make a cartoon version of myself for a profile picture?
Pick a cartoon profile picture maker, use a tight, front-facing headshot with good lighting, convert it with a classic or soft comic style, and center the face. Export a square image of at least 1000 by 1000 pixels, then test how it looks inside a circular crop.
9. Why does my cartoon result look blurry or distorted?
If you try to cartoonize image files and the result looks off, the source is usually low resolution, the face is turned too far from the camera, or the effect strength is too high. Try a larger, cleaner photo, a front-facing angle, and a lower intensity. Switching styles also helps.
10. Can I cartoonize pictures of pets and landscapes?
Yes. Pets work well with flat illustration and storybook styles, and landscapes suit painterly or anime-style looks. Avoid heavy outlines on dark fur and wide scenes, since they hide detail and clutter the image.
Conclusion
Learning how to turn a image into a cartoon comes down to a few repeatable habits: pick a clear photo, choose a style that suits the subject, keep the strength moderate, and check the file before you share it. Online converters give you the fastest results, phone filters cover quick edits, and desktop tools or hand tracing give you full control when you need it.
If you'd like to try it right now, you can cartoonize image files directly on X2X Converter. Upload a clear photo, test two or three styles, and keep whichever one looks most like you.
- Managerial Effectiveness!
- Future and Predictions
- Motivatinal / Inspiring
- Fitness and Wellness
- Medical & Health
- Manufacturing
- Education
- Real-Estate
- Food Industry
- Hospitality
- Online Games
- Sports
- Home Services
- Civil Engineering
- Safety and Protection
- Software Products & Services
- Fashion and Jewellery
- Artificial Intelligence
- Entrepreneurship
- Mentoring & Guidance
- Marketing
- Networking
- HR & Recruiting
- Literature
- Shopping
- Career Management & Advancement