

 SkillClick
How to Mount an Action Camera to a Motorcycle Helmet Without the Wobble
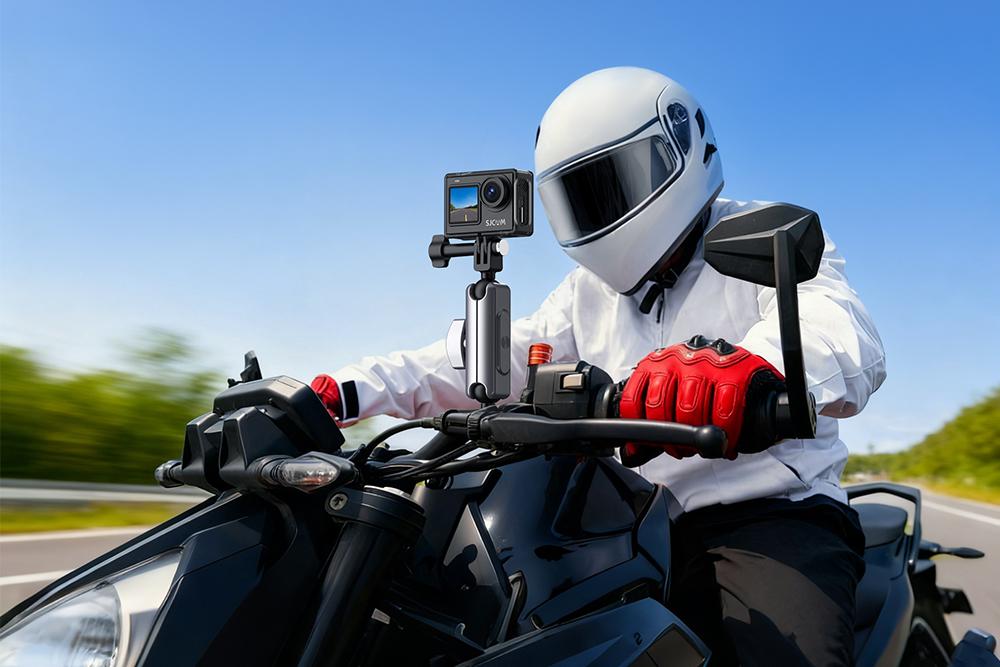
If you’ve ever reviewed footage from a ride only to find it looks like a shaky, blurry mess, you know the struggle. You invested in a decent motorcycle action camera, strapped it to your lid, and hit the open road. Yet, instead of crisp, cinematic captures of your journey, you got a video that looks like a low-budget earthquake documentary.
The “wobble” is the bane of every motovlogger and adventure rider. At speeds above 40 mph, wind resistance, helmet vibration, and poorly designed mounts combine to create a harmonic oscillation that ruins footage and can even distract the rider. Worse, a loose camera is a projectile hazard—if it detaches at high speed, it could hit you, your passenger, or another vehicle.
The good news? You don’t need to spend thousands on a gimbal system to fix this. You just need to understand the physics of the mount, choose the right hardware, and secure your device properly.
Here is the definitive guide to mounting an action camera to your helmet with zero wobble, ensuring your motorcycle action camera captures every mile in rock-solid stability.
1. Start with the Right Base (The Adhesive Matters)
Most wobble issues don’t start at the camera—they start at the base. The adhesive mount is the foundation of your entire setup. If that isn’t solid, nothing else will be.
- Go with 3M VHB (Very High Bond) Tape: Cheap, generic adhesive pads are a recipe for disaster. You need specifically rated 3M VHB tape. This is the same tape used to hold building facades in place. It is designed to withstand extreme temperatures, high vibrations, and moisture.
- Surface Preparation is Non-Negotiable: You cannot just stick the mount onto a dusty helmet. Use an alcohol wipe to degrease the area completely. Then, use a “primer” pad (usually included with quality mounts) to prep the surface. Wait 60 seconds for it to dry before applying the mount.
- The 24-Hour Rule: This is crucial. After applying the mount, do not attach the camera and ride immediately. Leave the helmet in a room-temperature environment for at least 24 hours. This allows the adhesive to “flow” into the microscopic pores of the helmet shell, creating a molecular bond. This single step reduces 90% of mid-speed wobble.
2. Kill the Leverage: Mount It Low and Central
The most common mistake riders make is mounting the camera on the very top or side of the helmet for a “cool” aerial view. While this looks great for vlogging, it doubles the amount of wind leverage against the mount.
- The Chin Mount (The Gold Standard): The best place to mount a motorcycle action camera for stability is the chin bar. This position is closer to your center of gravity and sits in the “bubble” of calm air created by your windscreen and body. It catches less wind than the top of the helmet, which means less drag and vibration.
- Side Mounts: If you have a modular (flip-up) helmet, avoid side mounts. The moving parts of the hinge create micro-vibrations that are transferred directly to the camera.
- Low Profile is Fast: The lower the camera sits, the less torque is applied to the adhesive mount. Every inch you drop the camera reduces the “lever arm” effect that causes the shaking.
3. Upgrade Your Hardware: Why the “Curved Adhesive” Beats Clamps
While clamp mounts that attach to the visor seam are easy to remove, they are the worst offenders for wobble. They rely on friction and pressure, which loosens as you ride.
- Curved Adhesive Mount: These are designed specifically for the spherical contour of a helmet. They offer a 100% flat bond to the shell.
- The “J-Hook” Bridge: Instead of using a single adhesive nub, use a “J-Hook” base (like the GoPro “J-hook” or SJCAM equivalents). This allows the camera to be mounted lower on the bucket while still using a secure, fixed adhesive base.
- Tighten the Screws: It sounds obvious, but riders often forget to tighten the pivot arm screws with a coin or screwdriver. Hand-tightening is not enough. A loose pivot arm is the primary source of “jello” in your footage.
4. Secure the Camera Body: The “Tethered” Trick
Even with a perfect mount, cameras can suffer from “micro-vibrations” at high RPMs. This is especially true for inline-four engines that vibrate at high frequencies.
To eliminate this, you need to create tension:
- The Strap Method: Have a spare velcro strap (often included with cameras)? Wrap it around the camera body and thread it through your helmet’s ventilation port or chinstrap. This doesn’t need to be tight enough to hold the camera—it just needs to create a dampening counter-pressure. This physically stops the “rattling” of the camera against the mount.
- Weight Reduction: If you are mounting a large camera (like a full-size DSLR or a heavy action cam), consider a lighter model. A heavy camera on a helmet creates massive inertial forces. A lighter motorcycle action camera (around 80-100 grams) is less likely to catch wind and vibrate.
5. Flight Deck Testing (Before You Ride)
You must test your setup before heading out on the highway. Here’s a simple checklist:
- The Push Test: Hold the helmet with two hands and try to wiggle the camera. If there is any visible play in the mount, it will feel 10x worse on the road.
- The Wind Test: Stick your hand out the car window with the camera mounted (or run a stationary bike test). Slowly increase speed to 30 mph, then 50 mph. Listen for a “buzzing” sound—that’s the mount vibrating. Stop and re-tighten.
- The Thread Lock: If you are using a mounting screw that keeps loosening, apply a tiny drop of blue Loctite (threadlocker) to the screw thread. This prevents the screw from backing out due to vibration without permanently gluing it.
6. Tune Your Settings to Hide Micro-Jitters
Even with a physically stable mount, rolling shutter can cause “jello” effects if your frame rate isn’t high enough. To compensate for inevitable road vibration:
- Shoot at 60fps (frames per second). If you are shooting at 30fps, the motion blur between frames can look like a wobble. 60fps allows the video editor to smooth out micro-movements.
- Enable Hypersmooth/Stabilization: Modern motorcycle action camera models feature built-in gyroscopic stabilization (like EIS – Electronic Image Stabilization). Make sure this is turned ON. However, note that EIS can “hunt” in low light. A properly mounted camera with EIS off will often look better than a loose camera with EIS on.
7. The Wind Dampening Trick
Wobble isn’t just vertical vibration; it’s also horizontal buffeting caused by turbulent air hitting the camera’s flat screen.
- Use a Foam Windscreen: Some mounts come with a small foam pad (dead cat cover) that goes on the microphone. This isn’t just for audio. If you place a small piece of foam tape on the front edge of the camera (away from the lens), it acts as an aerodynamic splitter, breaking up the wind before it hits the body.
- Tuck the Cable: If you are using an external microphone, route the cable under the helmet shell padding. A flapping cable at 60mph will yank the camera side-to-side, causing a severe wobble.
The Verdict: Do You Need a Gimbal?
For most riders, no. A physical gimbal adds weight, bulk, and battery drain. The methods above—using a high-bond adhesive, mounting on the chin, and tightening the pivots—will give you a 95% stable image.
However, your stability is only as good as the camera’s internal gyroscope. If you are using an older camera with weak stabilization, you will still get wobble even with a perfect mount.
Upgrade Your Mount: The Camera That Holds Its Ground
If you are still struggling with a shaky image, the problem might not be your mount—it might be your motorcycle action camera. Many budget cameras lack the internal sensor technology to compensate for high-frequency vibration.
After rigorous testing with the mounting techniques above, we highly recommend the SJCAM SJ6 Ultra as your go-to helmet camera.
Why the SJCAM SJ6 Ultra is the Perfect Helmet Companion:
- Industry-Leading Gyro Stabilization: The SJ6 Ultra features a 6-axis gyro stabilization system. This is specifically designed to counteract the high-frequency vibration of motorcycle engines and helmet buffeting. It effectively “smooths out” the micro-jitters that occur even when your mount is physically perfect.
- Lightweight Design: At just a few ounces, the SJ6 Ultra is light enough to sit on the chin bar without creating excessive leverage or neck strain on long tours.
- Dual Screen for Perfect Framing: Mounting a camera on the chin bar makes it hard to see what you are recording. The SJ6 Ultra includes a front-facing touch screen, so you can precisely frame your shot before you ride, ensuring you aren’t just capturing the asphalt.
- Wind Noise Reduction: The built-in microphone is optimized to cut down wind static, working hand-in-hand with the foam wind jammer to ensure your audio is as stable as your video.
Final Tip: Pair the SJCAM SJ6 Ultra with a curved 3M adhesive mount on your chin bar, let it cure for 24 hours, and set the video to 1440p at 60fps. Activate the SuperView mode to capture your handlebars and the horizon.
With a secure mount and a high-quality motorcycle action camera like the SJ6 Ultra, you can stop worrying about the wobble and start focusing on the ride. Safe riding, and capture every mile!
- Managerial Effectiveness!
- Future and Predictions
- Motivatinal / Inspiring
- Fitness and Wellness
- Medical & Health
- Manufacturing
- Education
- Real-Estate
- Food Industry
- Hospitality
- Online Games
- Sports
- Home Services
- Civil Engineering
- Safety and Protection
- Software Products & Services
- Fashion and Jewellery
- Artificial Intelligence
- Entrepreneurship
- Mentoring & Guidance
- Marketing
- Networking
- HR & Recruiting
- Literature
- Shopping
- Career Management & Advancement